What Time Reveals as It Passes

Today Annie graduated from Time for Tots (preschool). It’s official: she is no longer a tot. She’s a kindergartner. It is very hard to let the littlest grow. Elisabeth said she can tell I am having trouble letting Annie grow up because I am still folding some of Annie’s laundry. And she is FOUR YEARS OLD, for crying out loud. To think I am still folding the tricky garments!
I can’t believe Annie could be a toddler much less a kindergartner. I remember still swaddling her (with a queen sized bedsheet) and nursing her every three hours when she was fifteen months old, while her face just got wider and wider. I think if Dan hadn’t surprised me with a trip, forcing me to wean her, her face might have popped. But, if I’d had my way I would have kept her tightly bundled up like a big glow worm. Alas, she came un-swaddled. Now see what has happened? Kindergarten.
And it’s not just Annie. Miss P is seven, and in the words of Annie, “Miss P is a BEAST at musical chairs.” She is also widely known for her piñata skills. While Elisabeth and Annie bemoan their lack of success in this particular area they declare, “Miss P gets A LOT of candy at a piñata.” Which she does.
It’s true, Miss P likes candy, but she does not like eating it by herself. Or doing anything else by herself, for that matter. She has been known to set up the whole SORRY game in the bathroom and gather all the children (including Esme from next door) so she would have company while going “number two”. In addition to candy acquisition, Miss P has a penchant for Elisabeth watching.
Elisabeth presides over Miss P, Annie, and Esme (from next door) like a little Queen Victoria with her ladies in waiting. The three girls hover as close as they can to Elisabeth just in case she puts down her book and decides to let them watch her play or draw. It is nice for her to have a gaggle of little ladies following her around, agreeing with whatever she says, giggling if makes a witty comment. On her Birthday, we took turns saying something nice about Elisabeth. The three little girls agreed, “She is so kind to us. She lets us watch her!” What more could ladies in waiting wish for.
Charlie, at age nine, is working very hard, on whatever he is working on. Last night I came down to tell him it was time for bed and he was frantically running in tiny circles, because he had not met his goal of steps for the day as measured by his pedometer. He is very serious at school, and very studious. Mrs. Gregg said he only lost control once this year. He was looking through a microscope at a crystal and shouted, “This is AWESOME!” Who can blame him? Could you stay calm under those circumstances? I reminded Mrs. Gregg that six years ago I called her to come take a professional look at Charlie, because his preschool teacher thought he might have special needs, due to his refusal to sing songs with hand motions during circle time. At the time, Mrs. Gregg thought he might not find the hand motions challenging enough. We are thinking she was right.
“It’s funny,” Mrs. Gregg said remembering my concern about Charlie’s abilities, “What time reveals as it passes.”
Charlie has been writing poetry lately. Sometimes, for a real good time, he writes poetry with his calligraphy pen. He has written acrostics for the girls. Annie’s included “Ant-like” and “Nimble”. He has written a whole collection of poems about popcorn, and also the Minnesota Vikings. But I will leave you with my personal favorite: “Hooray, It’s May”.
Hooray It’s May
Among the joy and parties of May
there is beauty
the flowers, grass, trees,
the best month.
School’s almost over.
The kids say,
“Hooray! Hooray! It’s May.”
If We Wrote A Christmas Letter

If we wrote a Christmas letter we would have to say this has been one of our more unusual years. Which is a big statement for us, because we have had some very unusual years.
What began for the Watkins as an eight week stay with us, has now stretched to almost a year and a half. As you already know, the most surprising part of their stay has been–to keep Johanna alive–the necessary cessation of all smelly activities in our house, which most notably include cooking and eating food. Another unusual feature of their stay has been international attention in the form of news articles about Johanna’s rare allergies from sources including the BBC, the Daily Mail, and People Magazine, to name a few. All of these articles give a nod to “Dan and Lucy Olson who eat out on the porch!”….all except the Washington Post, which gave a nod to “Scott and Lucy Olson who eat out on the porch!” Here is a link to our favorite article, and to a ten minute segment on our local news that explains her disease in more detail.
The kids were so excited to see our family interviewed on the news. Or more accurately, Dan and I were interviewed. The children sat quietly by like little owls that never blinked. Charlie was pleased that the rest of the family has now joined mom in the category of famous people. “You were already famous, Mom. Due to playing frisbee with a clown,” he explained.* (The clown and the frisbee, in the footnote below, were the low point of my year.)
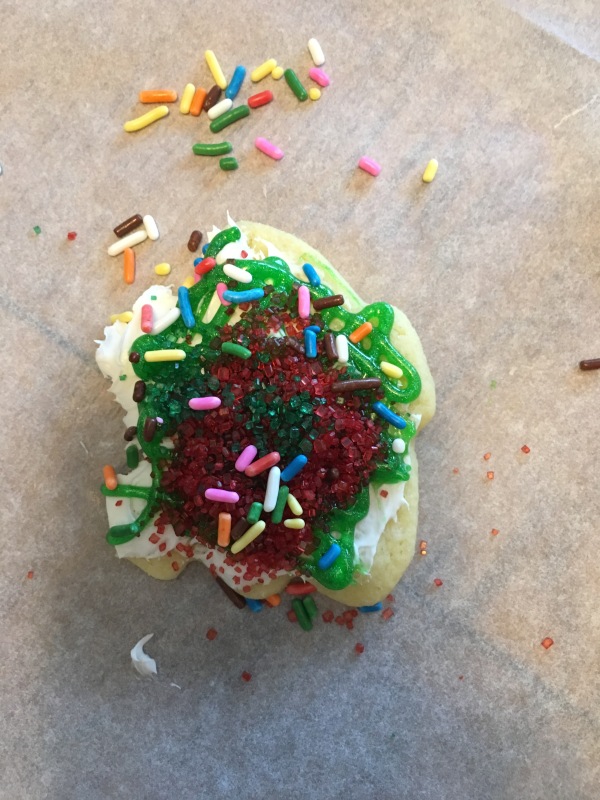
This week, we have been busy getting ready for Christmas. We decorated Christmas cookies (Which we baked at a neighbors house if you were wondering.) Decorating Christmas cookies is a little like having a baby. Somehow every year I miraculously forget the pain and want to do it again. I still don’t understand why it is such a disaster. Somehow the whole house looks ransacked by the end and it takes me two days to summon my strength to clean up the kitchen. Then twelve months later I think, wouldn’t it be fun to decorate Christmas cookies? I suppose it’s worth it for these appetizing dainties:
Last Monday we had our annual outing Christmas caroling at a nursing home. We visited a different nursing home this year. Dan printed song sheets. We took his guitar and a few violins. We sang and played for a group of folks gathered in the lounge for the occasion. Dan did his best to engage the audience and get them to join us in singing. Very slowly the realization dawned, as one person after another pointed at their ears and shook their heads: we were singing to a group of deaf people. That did not stop us. We went right on singing to the end. Maybe we will sing to the deaf every year. We are Christmas Carolers, and we do not discriminate.
In addition to cookie baking and nursing home singing, Annie and Miss P have been organizing the presents under the Christmas tree. Each morning, even before breakfast, all presents are removed from the tree, lined up, and sorted. Some days by size. Some days by weight. Some days by giver or recipient. It takes HOURS for the two of them to sort those presents. It is a big responsibility. They have to work together to move the big kahuna around every morning. In this big box is a present we cannot open too soon. It is a bathtub caddy that includes a book stand to keep your book out of your bath water. Bathtub reading runs in the family, but being still too short to reach the end of the tub, Elisabeth sort of floats and bobs around with her book half submerged. She does this every night. Most of our books have now been submerged. Aunt Betsy suggested the caddy. The school librarian would like to thank her.
Today, December 23rd, we are taking a break from our busyness and heading over to the dollar theater, where Christmas movies will be playing all day! I may have to forgo Miracle on 34th street at 2:00 for an emergency drive to Groth Music in Bloomington. I don’t understand what has gotten into me, but in the long tradition of my forebears, I am racing out at the last minute to make Charlie’s Christmas wish come true. It is very hard not to give a child what they want for Christmas. Especially when, being the musical bird that he is, his heart’s desire is not a toy, but an upright bass. Have you ever seen an upright bass? My friend Angie, whose husband is a professional bass player (and has agreed to get Charlie started with a few lessons) appropriately describes it as “a noble beast”. Thank the Lord we already own a large van. Or we would have to visit Groth music as well as the van dealership to make this dream come true. Last week, Charlie said he had a dream that he came down on Christmas morning and there was a cello under the tree. Even in his dreams he didn’t envision a giant bass. And the girls thought the bathtub caddy was a large package!
We are leaving for our Birmingham Christmas on the 26th, and so will be here in Minneapolis on Christmas day which is something we have never done before. When we made our plans months ago, we didn’t know that our house would still be Johanna’s makeshift hospital with various family members camping out here to help her and a long list of off-limits Christmas activities such as: candle burning, fireplace lighting, hot drink drinking, and live tree trimming.**
But do you know what? Every time I start thinking about navigating the logistics of Christmas Day under such unusual circumstances, all my thoughts are drowned out by one voice: “I was sick and you visited me.”
Johanna is so so sick. And although many people are working so hard to renovate a house with a special wing she can safely live in, right now she cannot be safely moved. She really doesn’t have anywhere else to go. And we love her so. To have the honor of giving her and her husband a little shelter in their storm feels to me like we’ve got baby Jesus himself up there in our master bedroom. I can’t think of anything more Christmasy than that. We are grateful to them for giving us this privilege… especially on Christmas.
Merry Christmas to all!
Love,
Dan, Lucy, Charlie, Elisabeth, Miss P, and Annie
*Footnote: You know what is not Christmasy? Playing frisbee with a clown, I’m telling you. I found myself in this unfortunate situation last July in Amery, WI. We were in Amery anyway, and seemed like such a good idea to take the kids to the little one-ring circus that had been set up in the vacant lot behind the fire station, right by the big recycling bins. It was a big tent with at least 500 people crammed in there and a truly impressive little circus run by a circus family. As I sat, pleased to be enjoying such affordable and family friendly entertainment, the lone clown called out for a volunteer. His eyes scanned the crowd. Not only did I not raise my hand I attempted to disappear but there was no place to run. He made a beeline for me. It all made sense when I learned the activity for which he needed me: throwing rings over my head from various distances. I have always been known for my very large head. Dan also comes from a family of genetically big heads. Together, he and I produce little lollipops (as explained in this post). Clearly the clown thought a nice, tall, lollipop shaped adult was his best bet. The worst part was the expectation that I would throw the rings back to him like frisbees. I cannot throw a frisbee. They went all over the place. It was a nightmare. And the clown and I, the only act in the center ring, seemed to have one of the longer acts in the circus. It went on and on and on. I was covered in sweat. It was just awful. The price of fame I guess.
**I must say it is probably for the best that we couldn’t have a live tree this year, as explained in this old post.
Life is like a bowl of Halloween Candy
Life is like a bowl of Halloween Candy. You never know what you’re going to get. And you’re not quite sure what to do with it all.
The children are at this magical age where you’re not quite sure if they are biggish babies or babyish big kids. They are little enough that telling them they are having an Adventures in Odyssey slumber party — which involves getting into bed at six o’clock and listening to radio theater — still excites all four. But they are big enough that they actually stay upstairs and leave you alone to your Canasta game.
They all seem about the same age, due to having had them “in a litter” as Claire put it. They all look about the same size due to the big ones being a little on the small side and Annie being a little on the large side.
I have been asked many times if the four of them are triplets (?). They are very merry most of the time — and never more merry than Halloween.
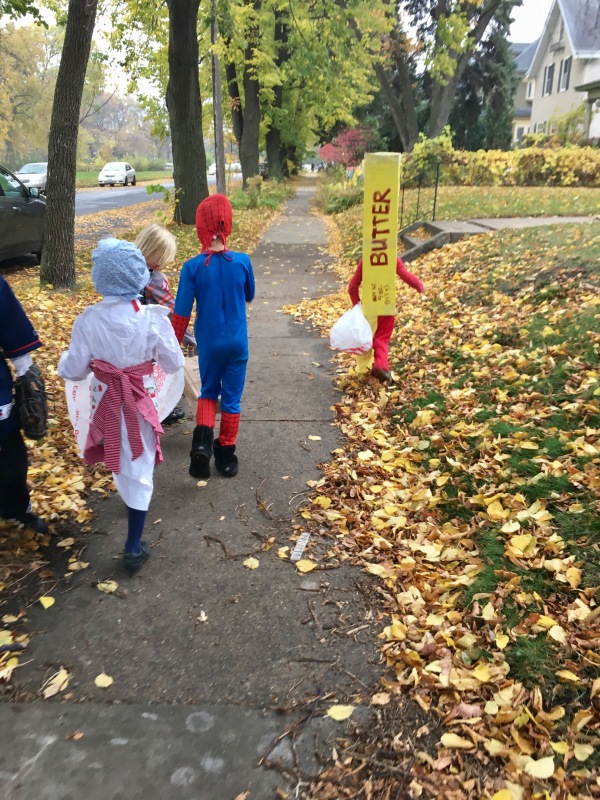
This year we went around our neighborhood and then travelled over to the Hoffner’s to trick or treat with them in their neighborhood. I realized with sinking heart about half way through the evening that the downside to babyish big kids (as opposed to biggish babies) is I won’t be able to get away with throwing out ninety percent of the candy while they sleep and leaving a few choice pieces to be enjoyed.
Sure enough. They brought home four huge bags of candy. And each handled it in his or her own way.
Annie sat on the floor and very methodically consumed ninety percent of hers and then felt so sick she gave the rest away.
After selecting just two or three favorite pieces, Elisabeth volunteered to donate the rest of her candy to those less fortunate individuals who hold a sign saying “Anything helps” along our route to school.
Miss P and Charlie bagged it, labeled it, and put it away in their desks for hoarding. I did make them touch each piece as they bagged it asking themselves, “Does this piece bring me joy?” — in the spirit of The Life Changing Magic of Tidying Up which we have been utilizing to take back our messy house.
Alas, every single piece of her candy brings Miss P joy. And almost every single piece of Charlie’s candy brings him joy. So that didn’t help the situation much.
The next morning we faced the awkward situation of two children with two gallon-size bags of candy each, and two children with no candy. I explained that it is rude to eat candy in front of others without offering to share, so if they chose to eat their candy publicly they needed to offer it to the sisters.
If they did not want to offer to share then they should eat it privately. Alone. In mom’s closet.
They have followed these guidelines so dutifully. Except that the candy hoarders are also the two extroverts, and after a try at private candy eating alone in a closet, both quickly came out to invite the candy-less sisters — in whispers — to come into the closet with them and share their bounty.
So for the past week — with permission — all four have secreted themselves away to the closet together to eat candy. It tastes so much better when there is an element of sneakiness. They quickly realized that they needed a password, so that if you are in mom’s closet eating your candy and someone knocks on the door three times and whispers “HopeAcademy12345” you will know it is your sister or brother come to join you for sneaky candy eating, and not some stranger off the street.
It reminds me of an ongoing game of Sardines. At any moment a child might be coloring at the table and suddenly realize the others are nowhere in sight. This phenomenon can mean only one thing.
Dash to mom’s closet. Knock the secret knock. Whisper the code word.
It’s candy time.
I am heartened that with all the candy sharing, the supplies are diminishing.
I also think, although we may have to foot the bill for some dental work, they won’t all be the same age sneaking around together forever. And it is so very merry around here. It’s worth a cavity or two.

First Day of School (1st and 3rd grades)
Today was a happy day for three little peppers.

Two went bravely into their new classrooms.
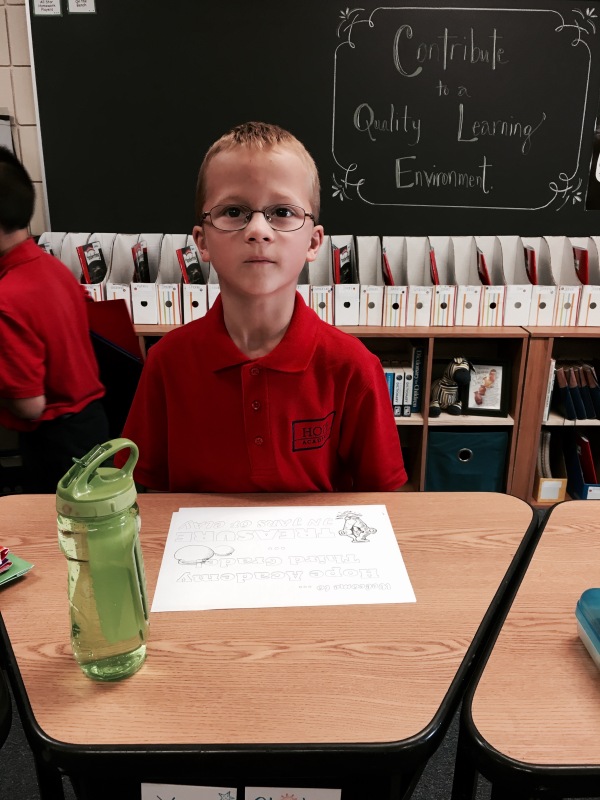

One hid her face in my skirt when the teacher said, “Hello Mary,”, which was less embarrassing than saying, “Hello”. But she quickly emerged so as not to draw attention to herself which would have been more embarrassing than saying, “Hello.”

The only ones not happy were Annie and me, who had to return to the dirty van instead of joining our friends in their brand new classrooms. We feel like the only ones who didn’t get invited to a party. Poor Annie. She even carried an empty backpack and an empty lunchbox for the occasion.
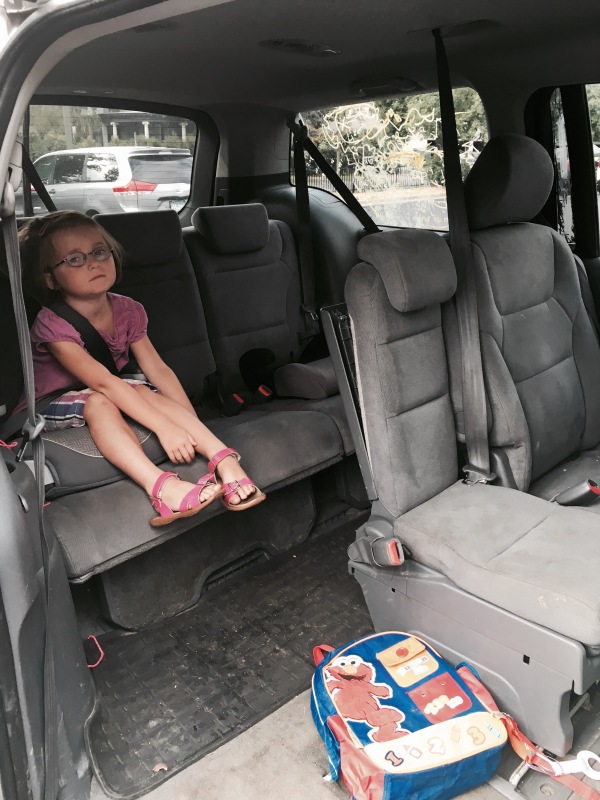
We came home and she cheered herself up by packing a picnic in her lunchbox and eating it in the living room. That always helps.

Patty’s Chickens
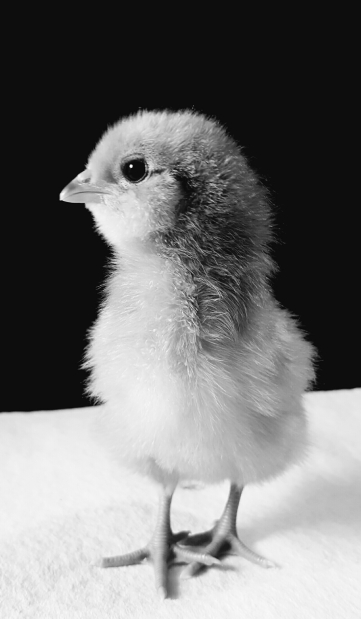
Last month we picked up a big batch of fertilized eggs from farmer Bryan for our annual Easter chick sale. The proceeds from sale will pay for food for our laying hens for a whole year, which cuts down on Dan’s propensity to speculate about the expenses that went into each and every egg that we eat.
In addition to the care of chickens, it turns out Farmer Bryan is also a chicken photographer (see above photo). There aren’t a lot of chicken photographers around. It’s a real niche. Dan had an uncle who was a cow photographer. Another niche.
Farmer Bryan also has an awesome barn which houses an awesome ping-pong table. Which blew Charlie’s mind. He questioned how an individual who lives on a farm could possibly have a ping-pong table when everyone knows people who live on farms are poor?
Dan answered this understandable question with a very enlightening lecture on farm subsidies. I am not sure farm subsidies really apply in the case of a second home hobby farm with 50 chickens. But Farmer Bryan does have a really great apple tree so maybe.
The ping-pong table is not the only mysterious thing on the hobby farm. There is also an outhouse which is exciting, and a big skull on the ground way to the outhouse. It looks like a skull from a big ox, or something decorative one might see on a ranch in the wild west. Miss P did not think it all that mysterious, casually pointing it out on her way to the outhouse and explaining, “Farmer Bryan killed that dinosaur.” A real Sherlock that one.
Retrieving the eggs turned out to be the simplest part of the Easter chick sale. My indoor hatchery was an uphill battle this year. After I set up my incubators, we got worried that the slight smell might make it’s way up to the Watkins’s room and give Johanna a headache or worse, so to be on the safe side we decided to move the incubators. But where to set up shop? Of all people, my neighbor Patty, who is knows by friends and family to be an animal not-lover, offered her basement for the hatching of 100 chicks (Two batches of 50). If that isn’t love….
The hatch started on a Friday night and by Saturday Patty was hooked, spending several hours in the miracle of birth basement watching the hatch. Only after the first 50 hatched did I realized that the basement would be too cold for them once they left the incubator. So Patty, being in too deep to turn back now, agreed to let them have the upstairs bathroom. After all, what are a mere 50 young chickens in the bathroom between good friends.
All weekend after the hatch, Patty entertained a stream of friends and relations stopping by to see her bathroom full of chickens for themselves. No one can believe it!
One of these visitors was Melissa, the new kid on our block. She is something of a local celebrity due to her very popular blog: thefauxmartha.com. Last week I saw her out being photographed with her cool bike. In the snow. For a magazine. She is also on Instagram. Do you know how many Instagram followers I have? 65. Do you know how many she has? 65,000. She joined Patty and me in the basement to watch the hatch. And to take some pictures. For Instagram. I was (briefly) so proud.
But pride goes before a fall. After the hatch, Melissa was helping me settle the chicks in a big tupperware with little feeder and waterer, and for some reason the waterer wasn’t level so I tried to wedge it into the corner tighter. Then the reason it wasn’t level sort of squirted out. It was a former chicken. That was awkward.
But other than the embarrassing incident with Flat Stanley, which was not exactly what Melissa was wanting to show her 65,000 Instagram followers, the hatching and selling went quite well. Although, I did have one hatch in my pocket. That was a rush.
I was throwing out the duds (or the eggs that never hatched) in the woods across the street, and one of the eggs started squeaking, so I put it in my pocket to try to keep it warm. On my way back to the house I felt little claws scratching my leg. Sure enough, instead of an egg I pulled a chicken out of that pocket. And he lived to tell the tale. But only for 24 hours. The next day right in the middle of telling it again, that chick keeled over dead. I guess the shock of his birth story just overcame him.
To my relief I managed to sell all the chicks before they got too stinky. The same cannot be said of the food in our house, which, as Johanna’s health has worsened (see her Caring Bridge update here) has become altogether too stinky. While we had already stopped cooking supper in the kitchen, we were still doing some basic things like breakfast inside the house. We have now, out of necessity, moved all food related activities to the front porch and set up a little dining area there. It is very campy. Also very cold. And every meal upcoming meal (and they upcome so frequently) is like a riddle to be solved: where to cook it and how to get it (and all of us) onto the porch at the same time without the smell wafting into the house. I have many options due to the most touching response of our neighbors. No sooner did word of the situation get out than I had keys to the five closest kitchens on the block. One friend said people don’t do that here in the city. But I guess they do. I have the keys to prove it!
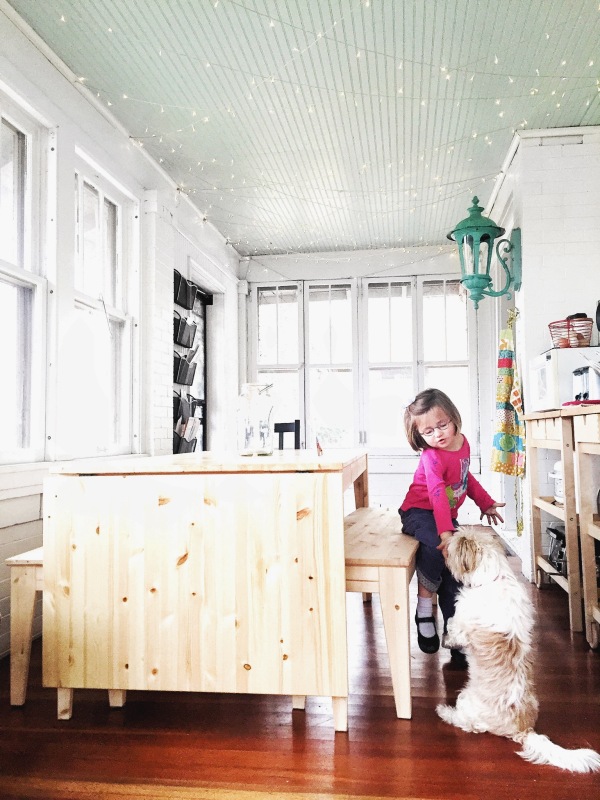
Below: Annie eating on the porch (photo by Melissa).
Happy Birthday Miss P
Today Miss P turned six. I am so happy for her. We celebrated her birthday on the porch, with pancakes for supper and space heater (it was snowing). Miss P is such a spunky little thing at home who has no trouble keeping up with her sibling Joneses (as seen in the videos below). But you never know what your child’s school personality will be until they start school. In the words of her teacher: “Mary would never make a peep.” Mary seems quite determined not to call attention to herself at school. She rarely asks for help, and wouldn’t dream of checking out a library book. Naturally, she has forbidden me from bringing cupcakes on her Birthday. But she LOVES kindergarten. And I love having a kindergartener. The perfect age. I wish I could always have one.
Just Chillin’ With Our Friends
Did anyone else receive an auto-generated slideshow last week on Facebook in honor of “Friend Day”. Random pictures from my Facebook account were set to music and there was a message on each picture like: “Remember these friends?” and “Your friends are awesome!” Since the only pictures I ever post are of the children, they pretty much dominated my Awesome Friends slideshow.
I have no problem with my small circle of four friends. I questioned, however, if Annie would include me in her list of friends, when she asked me last week, “Mom, have you ever played with me?”
And do you know, I don’t believe I have! I consider it a small victory that she just now noticed and it has been three years. It is all thanks to my other three awesome friends who have done that job for me. I don’t feel too bad since I never played with them either. I only got away with it because I started with twins who played with each other saving me the awkward role of playmate to that first child.
But although I don’t play with them, we do enjoy a variety of other activities together, including ice skating. Dan’s Christmas present to me was an ice rink in our yard. He approached the project with his usual thoroughness, beginning with several months of online research and a lit review. Then began the planning/measuring/marking/drawing phase. Then there was the zamboni building week. (I never really understood the zamboni but it involved a lot of pvc pipe, a big beach towel, and 60 tiny holes). Because you wouldn’t want to find yourself with a fine rink and no zamboni! The final implementation phase was not without setbacks, but the results, seen in the video below speak for themselves.
Dan has found real fulfillment in his new role of zamboni man. Most every night, whether the rink needs attention or not, Dan suits up and heads outside to patch tiny cracks, and resurface the ice. He stays gone so long! No matter the temperature, he said it is so peaceful out there, listening to podcasts, hose in hand. I personally, don’t know how he can tear himself away from his awesome friends who are partying inside the house, but I think he is really going to miss his after dinner routine when the ice melts.
In addition to maintaining his ice, Dan has recently taken up the sport of trapping mice. I think he finally got tired of me whispering at all hours of the night: “Did you hear it?” Now he sets his traps in the attic before bed and it is quite exciting in the morning. When they least expect it, one child or another comes up the stairs and sees only Dan’s legs dangling from the hole in the ceiling and they holler, “Dad’s checking his traps!” Once he caught two mice in the same trap. Bob and Cheryl. That was a real high.
Our winter is passing quickly between the ice-skating and the mouse trapping and our newest pastime: dining out! Those who read the Watkins caring bridge site (caringbridge.org “Johanna Watkins”) are aware that she has developed symptoms of anaphylaxis in response to the smell of food. She is in such a weakened condition that it has gotten to the point where we can no longer cook in the house. I tried setting up a “porch kitchen” with a microwave, electric skillet, etc. but even that was too stinky, so we are taking our show on the road and eating everywhere but home. One of our favorite haunts has become the teacher’s lounge at Hope Academy. You should try it. You can heat your food up right there in the microwave and then run around the halls for a while with your awesome friends. I don’t know why we never tried it before. We have also enjoyed once or twice a week restaurant dining thanks to generous gift cards from friends. Last week we received a mysterious 100 dollars on our front porch with a note to “bless our children” from an anonymous friend of the Watkins. So I have let them order a few actual kid’s meals (instead of an adult meal split four ways). They find kids meals are a blessing on many levels including the beverage level. Not that an adult meal split four ways is not a blessing. It is, but it comes with four waters. Sometimes a kid’s meal even comes with a cookie. Imagine.
Dining out is only one of the many blessings that has come to us by way of the Watkins. Johanna’s cheerful sister and brother take turns coming over to help with her care and have become dear friends. Charlie gets to pal around with his teacher who is rubbing off on him, I am happy to say. He told me last week, “Me and Mr. Watkins are obsessed with learning”. The little things we have given up (such as grocery shopping and doing dishes, ha!) are vastly outweighed by gain every day. It is a pleasure.
On Thanksgiving We Put Up Our Dickens Village
 One month ago Elisabeth made her own count-down calendar on which she counted the days left until we set up our Dickens Village. Our Dickens Village was a gift to us from our dear neighbors Bob and Kathy. Bob and Kathy lovingly collected all fifty seven pieces (plus shrubs, hedges, and trees of the forest) over a period of thirty years and then, of all things, gave the entire collection to us!
Last year was our first year to enjoy our miniature village. We set it up in the dining room, but arranging and rearranging the little scenes proved to be so distracting for me (at its peak causing a grease fire on the unattended stove) that I decided to move it upstairs where it twinkles merrily on our bookshelf in the hall.
At long last, Thanksgiving arrived and after breakfast Dan began toting in the large tupperwares that house the 57+ boxes that house the 57+ pieces. Setting up the little village with all it’s cords, light bulbs, street lamps, figurines, skaters, carolers, and trees of the forest is a little like giving birth. When it finally ends you swear you will never do it again. But by next year you have forgotten all the pain, and the prospect of a hallway full of twinkling lights greeting you when you get up to go to the bathroom in the night, spurs you to open 57+ boxes and start the whole process over.
It was a good thing I wasn’t planning on any serious Thanksgiving cooking since the majority of the day was spent setting up the village. We decided not to roast a turkey this year for two reasons. A. Mrs. Watkins is allergic to turkey, and we desired neither to taunt nor sicken her with the smell of the roasting bird. And B. None of the children like turkey, nor do I. Dan is the only one who likes turkey (but not a lot) and that is a lot of meat for one man who doesn’t like turkey very much. What a relief to be released from turkey roasting and instead chained to a flank steak on the grill for a mere twelve minutes per side.
I say the children don’t like turkey because that is what they told me last year when I roasted a turkey. Only today when I didn’t roast a turkey they suddenly experienced a burning love for turkey. Fortunately, Patty has not been released from turkey as I have, and so I sent the girls down the block after their steak dinner. They came back with little turkey “to go” plates. Which they enjoyed very much.
We have a lot of meat confusion generally. Not just remembering what kind of meat we like but also what kind of meat we are currently eating. I was mortified this summer when we invited Charlie’s first grade teacher and his wife for a fine teacher appreciation dinner, and Miss P asked very seriously with a mouth full of steak, “Is this really meat from a monkey’s bottom?” Apparently, her nice sirloin steak resembled something she had seen that day at the zoo. When I assured her it was not, she held out her plate and said, “Well then gimme some more of that good chicken!”
Prompting Charlie to correct her, “Miss P, steak is not chicken…it’s pork.”
The confusion extends to other food groups. Yesterday, after a big lunch, the kids went poking around the kitchen looking for something to eat (NOTHING makes them as hungry as a big meal), and found grapefruit.
Miss P: “What is grapefruit?”
Charlie: “Miss P, you don’t know about grapefruit? It’s the most AWESOME vegetable!”
I would tend to agree with Charlie. It is the most awesome vegetable.
Below: Miss P identifies with another carnivore.
Where Does Your Teacher Live?
By age seven, I think most children have realized that their teacher doesn’t live at school. It comes as a shock. Do you know what is more shocking than learning your teacher goes home at night? Learning that your teacher will be coming home to your house.
That is exactly the shock young Charlie received in September when I told him the news: Mr. and Mrs. Watkins, Charlie’s new second grade teacher, and Elisabeth’s former first grade teacher, would be moving in with us. Not moving into our basement, but moving right into the bedroom down the hall. Charlie took the news in stride. He had just one question, “Will Mr. Watkins be riding home from school in our van?” When I told him he would not, Charlie became very flustered, “Then HOW will he get home?”
Another shock: teachers not only go home at night, they have their own cars, and drive them.
Well let me tell you it is handy to have your teacher right down the hall. If Charlie begins to panic because he is unsure about his homework, I just remind him he can ask his teacher who is pouring himself a cup of coffee just a few feet away. Handy!
The Watkins moved in rather suddenly, when they discovered mold in their apartment* and reported it to their landlord who very abruptly decided to terminate their lease rather than remediate the mold. We had only a week to convert the girls’s bedroom (a little suite really) to a mini-apartment of sorts for the Watkins, where they will live until next summer when they look forward to moving into a condo they are in the process of purchasing.
When I say we converted the room, I mean “we” in the loosest sense of the word. It was actually a rather large posse of Hope Academy teachers who moved all the girls belongings into Charlie’s room, then made the cutest tiny bedrooms for Elisabeth and Miss P each in their own walk-in closet, set Annie and Charlie up in bunk-beds, re-organized all the clothes, toys, furniture, books. Then, they stripped the carpet from the old room, painted the room, and meanwhile, babysat all four children for a whole weekend so I could preside over the process from a comfortable chair.
This is why I can never leave Hope Academy. Who would care for me in my hour of need? If I ever fall gravely ill, there is no doubt in my mind these people will have my back. I have seen it with my own eyes, as they have risen up to support Mr. Watkins with food, and prayers, and donated vacation time, as he supports Mrs. Watkins who is battling a terrible disease (with grace and courage).
Dan and I were reminiscing the other night about the many unusual people who have lived with us and started making a list of names which totaled exactly thirty. It has been so valuable for our children to grow up with such a diverse group of people to love them. But I think this may be the greatest privilege of all: to do life with someone who is living joyfully, without fear, in spite of great suffering and uncertainty. Those Watkins, they laugh in the face of danger.* And they live and believe, right in front of our children, that we already know the end of the story. “If the Resurrection is true…then everything sad is going to come untrue!” -quote from Tim Keller, who was quoting Lewis, who was quoting Tolkien. What more could I want for my children?
*One symptom of her disease is respiratory distress which was exacerbated by mold in the old apartment. Although Mrs. Watkins has confessed to me in confidence that shortness of breath may be due not to her lung disease but to the handsomeness of Mr. Watkins!

Annie Got Glasses
Each of the girls have been monitored by our pediatric ophthalmologist, because Charlie’s little vision issue (eyes crossing) is often hereditary. Much to my surprise, Annie was diagnosed with her own vision problem this summer. I had no reason to suspect she was having trouble seeing. It has always been her hearing that is in question due to her remarkably loud voice!
Dr. Pribila broached the subject of Annie’s need for glasses with a very extensive introduction and explanation of the situation ending in the phrase, “So I think she needs glasses.” Which he said very quickly and quietly while wincing like I was going to hit him!
He was visibly relieved when I clapped my hands and exclaimed how cute she was going to be. (I feel a little guilty about that).
He was understandably nervous that he might get whacked with my purse due to our rocky past relationship. When we first noticed Charlie’s eye crossing he had just turned two. I remembered that newborn baby eyes cross, and assumed that it was not a worry in a toddler. When Dr. Pribila not only told me it was a worry, but that we were going to have to patch his eye for four hours a day, I confess I burst into tears and stormed out and I think he might have heard me say: “I wish we had never come even come here. We were doing just fine until we met you!” It does not excuse my behavior but I had been wrangling three toddlers two and under for two hours in the doctor’s office and was pregnant and everything seemed overwhelming at the time including eye patching an active two year old.
Due to his level of concern we saw him every few weeks for a year or so and I did apologize and he and I have laughed about it since. I have not even considered whacking Dr. Pribila with my purse for many years. And how could I not feel so fond of anyone who considers my children’s beautiful eyes as fascinating as I do. So he had no need to fear breaking the news about Annie’s glasses, but I understand it was probably a little PTSD.
And the glasses are every bit as cute as I knew they would be. There is something about them that gives her the effect of a very squatty lady. Yesterday a stranger commented, “Oh she looks like an adult in a little tiny body.” Just when I think I couldn’t possibly love her more, she goes and gets glasses! Dan and I can just hardly keep from swallowing her whole.


